
How to Make a Button in HTML and CSS

If you are learning web development, knowing how to make a button is a great first project. Buttons are used for actions such as submitting forms, opening menus, starting downloads, and triggering interactive features. HTML creates the button itself, while CSS controls how it looks. Once you understand this basic combination, you can create buttons with different colors, sizes, rounded corners, and hover effects. This guide explains how to create a button step by step, shows beginner-friendly HTML and CSS examples, and explains when to use a button instead of a link. You will also learn a few common mistakes to avoid so your buttons remain clear and useful.
What Is an HTML Button?
An HTML button is an interactive element that a visitor can activate with a mouse, keyboard, touch, or another supported input. The <button> element is the usual choice for creating one.
A simple button looks like this:
<button type=”button”>Click Me</button>
The type attribute is useful because it tells the browser what the button is meant to do. A button with type=”button” has no default action. However, a button inside a form can act as a submit button when its type is not specified.
For a detailed explanation of the HTML button element and its attributes, see MDN’s official button documentation.
How to Make a Button in HTML
First, create a basic HTML document. You can use a simple code editor and save the file with an .html extension.
<!DOCTYPE html>
<html>
<head>
<title>My Button</title>
</head>
<body>
<button type=”button”>Click Me</button>
</body>
</html>
Open the file in a browser, and you will see a basic button. At this stage, the browser provides its default appearance.
However, the button does not automatically perform every action you might want. You can use it with a form or add JavaScript when you need custom interactive behavior.
How to Make a Button in HTML and CSS

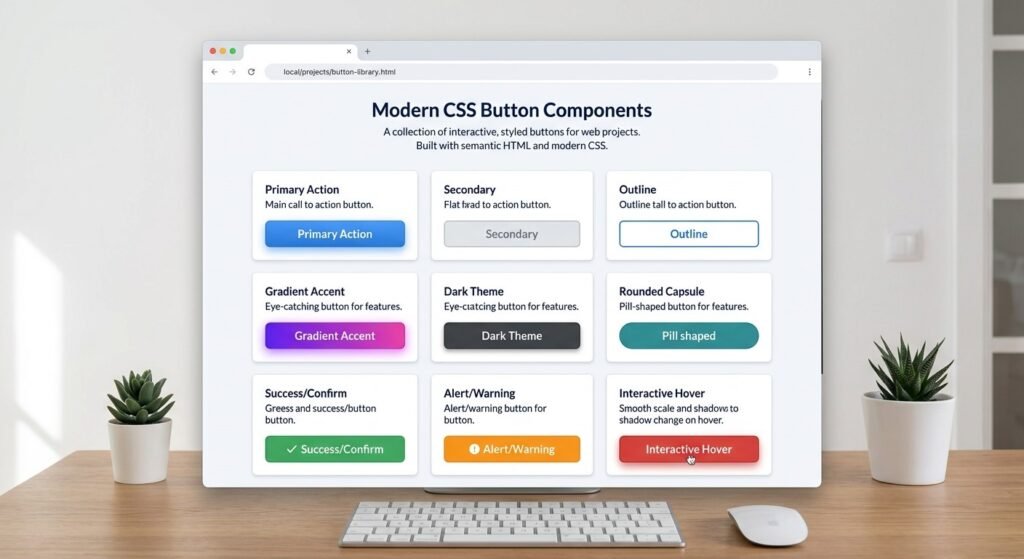
HTML gives your button its structure, while CSS controls its appearance. To make styling easier, add a class to the button.
<button type=”button” class=”my-button”>Learn More</button>
Now add CSS for that class:
.my-button {
background-color: #1261d6;
color: white;
padding: 12px 24px;
border: none;
border-radius: 6px;
font-size: 16px;
cursor: pointer;
}
Each property has a different purpose. background-color changes the button background, while color changes the text. padding creates space inside the button, border-radius rounds the corners, and font-size controls the text size.
The cursor property also changes the pointer when it moves over the button, making the element feel more interactive.
How to Add a Button Hover Effect
A hover effect changes a button when a pointing device moves over it. CSS uses the :hover pseudo-class for this purpose.
.my-button:hover {
background-color: #0b397d;
}
You can also add a transition so the color change feels smoother:
.my-button {
background-color: #1261d6;
color: white;
padding: 12px 24px;
border: none;
border-radius: 6px;
cursor: pointer;
transition: background-color 0.3s ease;
}
.my-button:hover {
background-color: #0b397d;
}
The :hover pseudo-class is widely supported and is commonly used to change the appearance of interactive elements. MDN’s :hover documentation explains how it works.
Keep in mind that hover effects are mainly useful for devices with a pointing device. A button should still be understandable and usable without depending on hover alone.
How to Make a Rounded Button
If you want a softer design, increase the border-radius value.
.my-button {
background-color: #1261d6;
color: white;
padding: 12px 24px;
border: none;
border-radius: 25px;
cursor: pointer;
}
A larger value creates more rounded corners. You can experiment with different values to find a style that matches your website.
Good button design is not only about appearance. Use clear labels such as Download, Submit, Save, or Create Account so visitors understand what will happen when they select the button.

Button vs. Link: Which Should You Use?
Beginners often make buttons and links look similar, but they have different purposes.
Use a button when the user is performing an action. For example, a button can submit information, open a menu, or change something on the current page.
Use a link when the user needs to move to another page or destination.
For example:
<button type=”button”>Show Details</button>
<a href=”about.html”>About Us</a>
CSS can make a link look like a button, but the HTML element should still match its purpose. Choosing the correct element makes a website easier to understand and can also support better accessibility.
If you want to understand the wider career opportunities around website creation, you can read whether web design is still in demand.
Common HTML and CSS Button Mistakes
A few small mistakes can make a button confusing or difficult to use.
Using unclear labels
Avoid labels that do not explain the action. “Click Here” is less informative than “Download Guide” or “Create Account.”
Making buttons too small
Buttons need enough space for comfortable interaction, especially on touch devices. A cramped button can be harder to use.
Removing focus styles
Keyboard users need to see which control currently has focus. Therefore, do not remove the browser’s focus indication without providing another clear style.
Using too many designs
Different colors, shapes, and effects on every button can make a website look inconsistent. Instead, create a small set of reusable styles.
Can a Button Work Without JavaScript?
Yes. You can create and style a button using only HTML and CSS.
For example:
<button type=”button”>Click Me</button>
This creates a button, but it does not automatically perform a custom task when clicked.
JavaScript becomes useful when you want the button to change content, open an interactive component, show hidden information, or perform another programmed action.
This is why HTML, CSS, and JavaScript are commonly learned together. HTML provides structure, CSS controls presentation, and JavaScript can add behavior.
If you want a larger learning path after mastering basic HTML and CSS, check out this beginner roadmap for becoming a web developer.
A Complete Beginner Button Example
Here is a simple example combining the main ideas:
<!DOCTYPE html>
<html>
<head>
<title>Styled Button</title>
<style>
.my-button {
background-color: #1261d6;
color: white;
padding: 12px 24px;
border: none;
border-radius: 8px;
font-size: 16px;
cursor: pointer;
transition: background-color 0.3s ease;
}
.my-button:hover {
background-color: #0b397d;
}
</style>
</head>
<body>
<button type=”button” class=”my-button”>
Learn More
</button>
</body>
</html>
Save the file and open it in your browser. Then try changing one CSS property at a time. You could change the background color, increase the border radius, or adjust the padding.
Small experiments are useful because they help you understand what each CSS property actually does instead of simply memorizing code.
What Should You Learn Next?
Once you know how to create and style a button, you can move toward larger webpage projects. Practice HTML forms, CSS layouts, responsive design, and then JavaScript for more interactive features.
You can also build practical projects while learning. For example, create a personal webpage with several buttons, a contact form, and navigation links.
Building projects can also help you develop skills that are useful beyond coding. You can read more about skills teenagers need for future jobs as you plan which digital abilities to develop.
The most useful approach is simple: learn one concept, build something with it, test your work, and then improve it.
Frequently Asked Questions (FAQ)
1. How do I make a button in HTML?
Use the <button> element, such as <button type=”button”>Click Me</button>. You can then use CSS to change its appearance.
2. How do I change a button's color in CSS?
Use background-color for the button background and color for the text.
3. How do I make a button rounded?
Use the border-radius property. A larger value creates more rounded corners.
4. How do I add a hover effect to a button?
Use the :hover pseudo-class and change one or more CSS properties when the pointer moves over the button.
5. Do I need JavaScript to make a button?
No. HTML creates the button and CSS styles it. JavaScript is useful when the button needs custom programmed behavior.
6. What is the difference between a button and a link?
A button normally performs an action, while a link takes the user to another destination.
Conclusion
Learning how to create a button is a great starting point for understanding how HTML and CSS work together. First, use the HTML `<button>` element to add a button to your webpage. Then, apply CSS to customize its colors, dimensions, spacing, borders, and hover effects. Once you understand the basics, try creating different button styles and discover when to use a button instead of a link. These practical skills will prepare you for more advanced web development tasks, including interactive forms, JavaScript features, and fully functional website projects.